How to Knit Baby Booties
Quick Links
- Archived - Ask a Knitting Question
- Basic Knitting Stitches
- Beginner Knitting Patterns
- Knitting Abbreviations
- Needle Sizes Chart
- Tension Squares
- Yarn Comparison Chart
FYI: This site receives a small amount in commissions from affiliate links and third-party advertising.
When I asked for suggestions for new pages on this site, how to knit baby booties was one suggestion that many, many, people requested. So here it is.
On this page we will go through the steps to knit a simple pair of booties using patterns that is suitable for beginners. Learning how to knit baby booties is not that difficult providing you find an easy pattern, and the two patterns on this page could not be any easier!
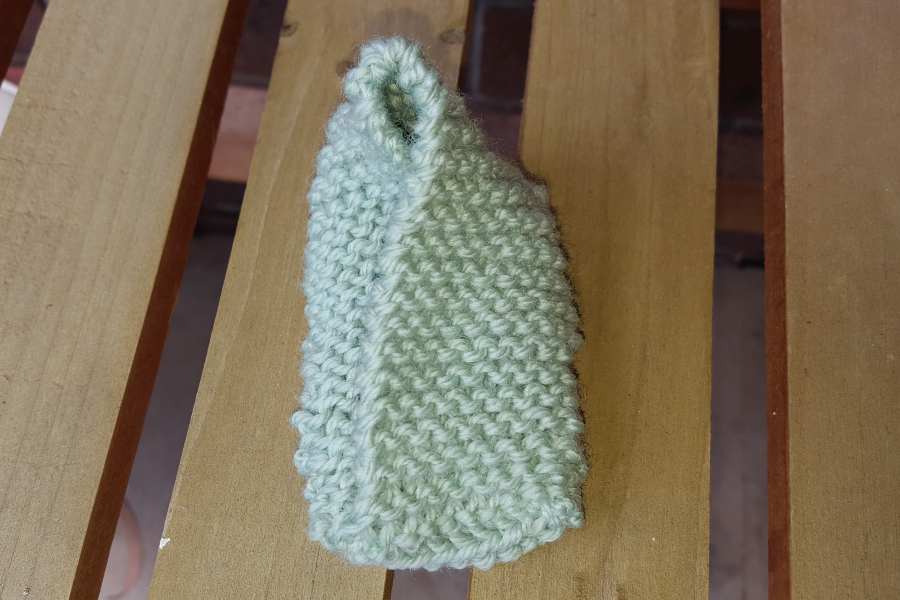
The first pattern on this page is a simple pattern in garter stitch. There are two pieces of rectangular knitting for each bootie, which are sewn together to form the bootie shape. Skills required for this version include:
The second version is similar in construction to the Simple Slipper Pattern designed to fit Children, Women or Men. The additional skills you will need for this pattern are:
- Decrease by knitting 2 stitches together
- Finishing by drawing the tail through all remaining stitches
How to Knit Baby Booties for Beginners: Version 1...
For my basic baby booties, I used Cleckheaton Country 8 Ply. This is a beautiful 100% wool yarn that you can find in most knitting stores, I use wool because I prefer using natural fibres but you can substitute for pretty much any 8 Ply (double knit, light worsted weight) yarn.
The recommended tension for 8 ply is 22 sts and 30 rows over 10 centimetres on 4.0 mm needles using stocking stitch.
The number of rows for garter stitch is a bit higher than stocking stitch (due to the texture created by the stitch pattern) but if you can match the tension in stocking stitch, you will be okay. And although it is important to test your tension until your knitting is consistent across projects, the tension is not especially critical for this pattern.
Sizes in this pattern are just estimates based on standard sizes (see the table on Knitting Booties page for the correct size for the age of your baby). If you want a perfect fit, I suggest that you measure the babies foot.
Instructions (make 2):
Piece 1: Cast on 10 sts using 4.00 mm needles and knit in garter stitch until the work measures 8 (9, 10) centimetres or the length of the babies foot.
Cast off.
Piece 2: Cast on 10 sts using 4.00 mm needles and knit in garter stitch until the work measures 20 (23, 25) centimetres or long enough to go along one side, across the bottom edge and back along the second side of bootie base.
Cast off.
Making Up Your Booties
Using a knitter's sewing needle ( a blunt needle with a large eye designed for sewing up your knitting) and use an over stitch or blanket stitch to join the sides of your two pieces together starting at the cast off edge of both pieces.
You start on the long side of your base, then work along the short cast on edge and then along the other long side of the base. You should now have a long rectangular box shape that is open at one end. Lay the first side down flat against the base and pin in place, then lay the second side down over the first side and secure with pins. Use an over stitch (blanket stitch) to secure both sides to the base to form the toe of your bootie.
Repeat for the 2nd bootie.

Knit the 2 pieces

Sew the upper to the base

Sew across the 3 layers on the toe
Now all you need to do is to turn your bootie inside out (or outside in really) and you are done. If you want to you can decorate your booties by adding a pom pom to each booties or like I have, you could add buttons. Entirely up to you...
How to Knit Baby Booties for Beginners: Version 2...
For my slippers, I used Cleckheaton Country 8 Ply and like for the basic booties in version 1, the recommended tension for 8 ply is 22 sts and 30 rows over 10 centimetres using stocking stitch.
So if your tension was good for the previous version it will be okay to knit this slipper style version of my basic baby booties.
Instructions on how to knit baby booties version 2 (make 2):
All in 1 Piece: Cast on 24 sts using 4.00 mm needles and knit in garter stitch until the work measures 9.5 (10.5, 11.5) centimetres or the length of the babies foot plus 1/2 the width.
Next row: k2tog 12 times. (12 sts rem.)
Next row: knit all stitches
Next row: k2tog 6 times. (6 sts rem.)
Break yarn leaving a long tail. Using a knitter's needle thread the tail through all 6 stitches and pull tight and secure with a knot.
Making Up Your Booties
Fold the slipper in half length-wise and sew the cast on edge together to form the heel. Using the tail at the gathered edge (the toe) sew the edges together from the toe to approximately 1/3 up the slipper towards the heel. Sew an invisible seam to avoid making the seams too chunky.
Want to know How to Knit Baby Booties with a more complex pattern?
You could try my basic baby bootie pattern, but be warned - this pattern requires you to do increases and decreases, short rows to shape the top of the foot and the toes and an eyelet row but the end result will look more like a traditional baby bootie than either of the two garter stitch patterns on this page.
Happy knitting!
Couldn't Find What You Were Looking for?
Try searching the site using the search box below:


Recent Articles
-
Shetland Knitting and Shetland Knitters
Feb 07, 21 07:44 AM
Shetland knitting and the women in the Shetland Isle who create Shetland lace are among the best knitters in the world. -
Fixing Knitting Mistakes
Jan 28, 21 02:35 AM
When you are learning how to knit, you are going to make a few mistakes. It might not make you happy but fixing knitting mistakes is par for the course. -
Shetland Lace Knitting
Dec 11, 19 07:03 PM
Shetland Lace Knitting is a particular style of knitting that developed in the Shetland Islands and was one of the main exports of the Island early in the last century.
 >
>


